Step 1
Start with your current price list
Take the price list you use today and start with the work you sell most often. Each main item can become a product. Separately charged options can become extras. You can add more as you go.
A product is the main item you select for a case, such as Zirconia. An extra is an optional addition, such as Premium, with its own price.
| Your approach | Example setup | When it helps |
|---|---|---|
| Separate products | Zirconia — $150 Premium Zirconia — $170 | Each variation has its own name and complete price. |
| Product + extra | Zirconia — $150 Premium extra — $20 | You select a base product and add an option when needed. |
You can combine these approaches across your catalog. The prices here are examples; use your own prices and currency.
Step 2
Add products and choose where they can be used
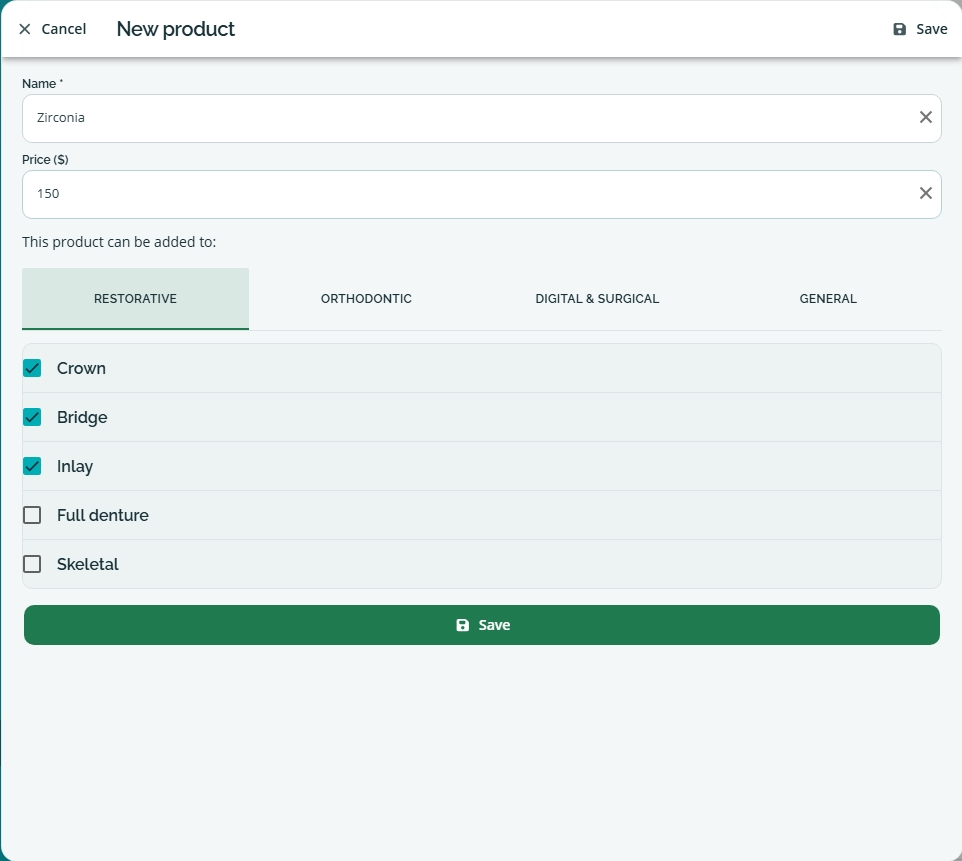
Open Settings → Products & pricing → Products and create a new product. Enter its name and price, then use This product can be added to to select the work types it applies to.
The category tabs group those types: Restorative, Orthodontic, Digital & Surgical, and General. The categories available depend on your lab’s specialty. Select the applicable types within a category, then save.
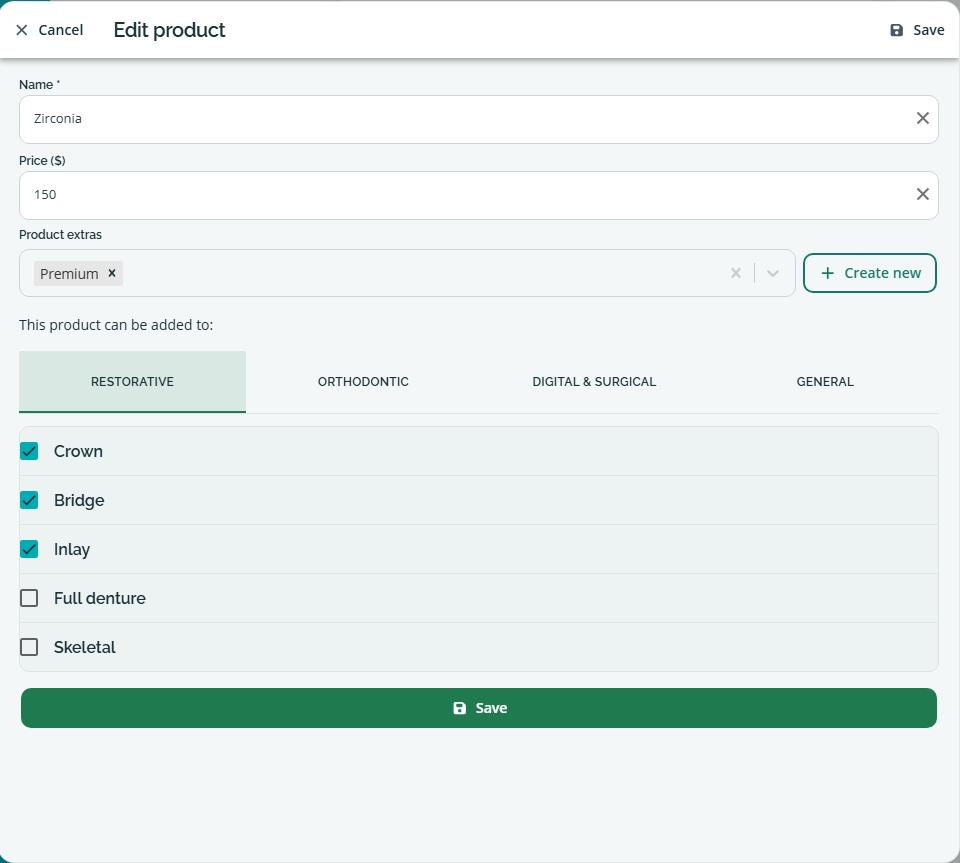
In this example, Zirconia costs $150 and is available for Crown, Bridge and Inlay. One product can apply to several types; create separate products if those items need different names or prices.
Step 3
Create your extras
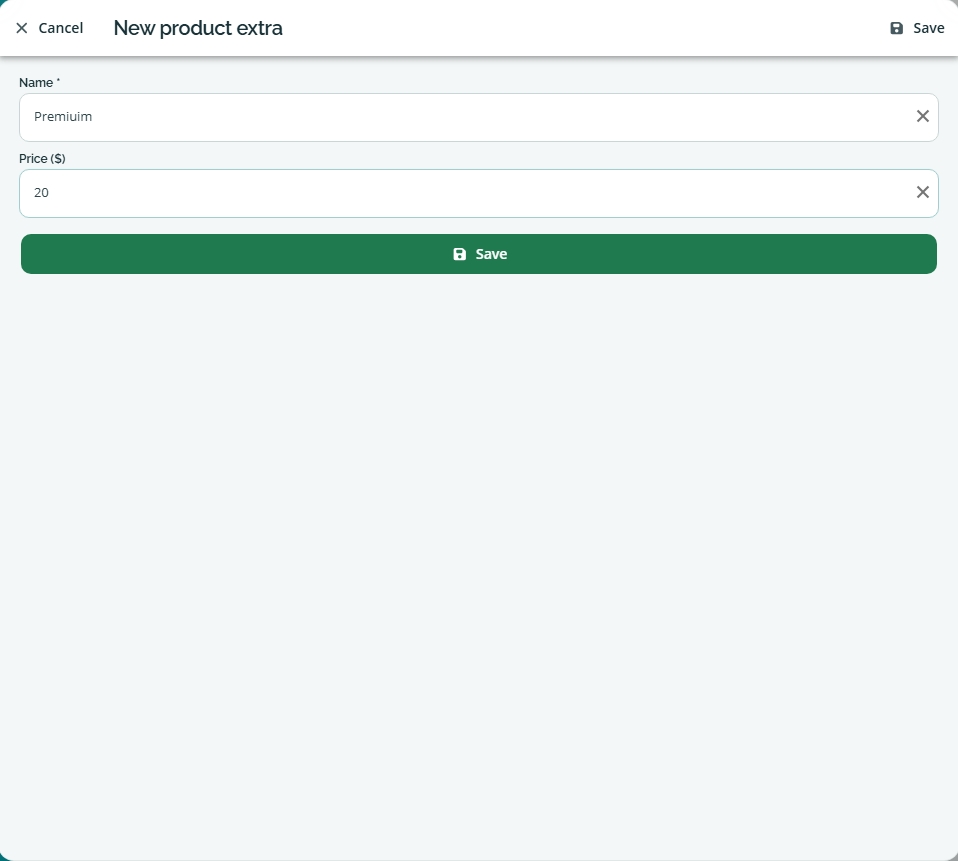
Open Settings → Products & pricing → Product extras and create a new extra. Give it a clear name, enter its price, and save. Here, the Premium extra costs $20.
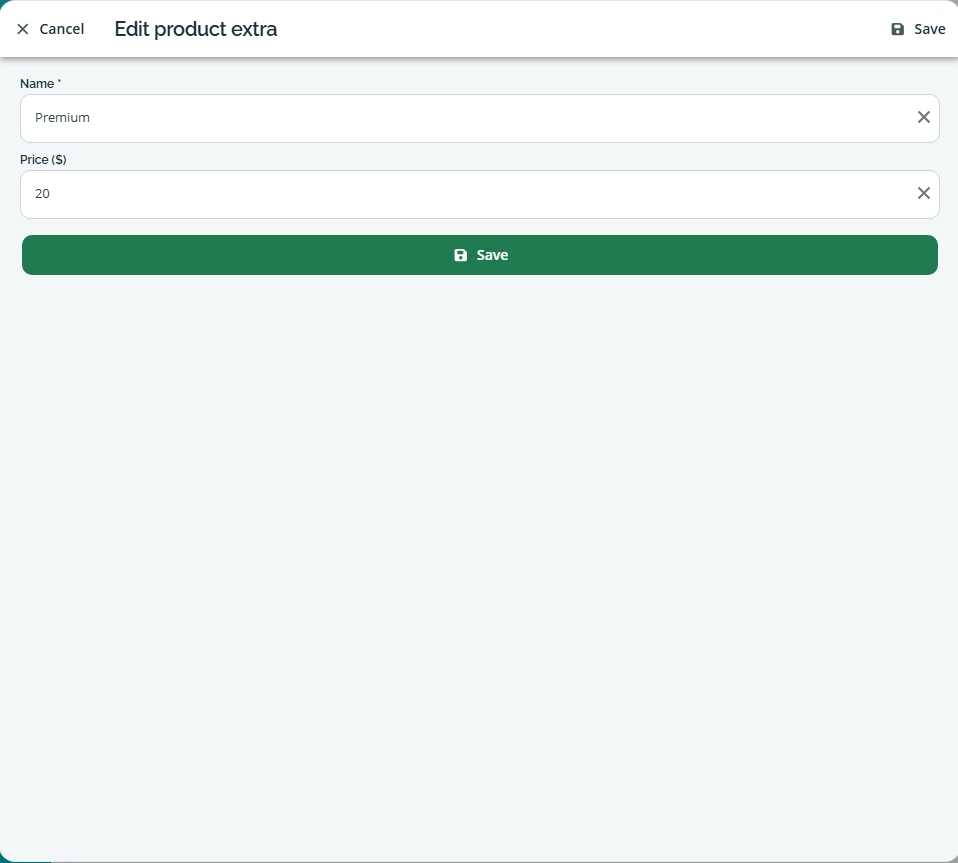
Need to change an extra later?
Open the existing extra and edit its name or price, then save.
Step 4
Attach extras to your saved products
Once a product is saved, open it for editing. In Product extras, select the extras commonly used with that product and save. You can also use Create new here to create an extra while editing the product.
In the example, Premium is attached to Zirconia. This makes it easy to find when choosing Zirconia for a case. Attaching an extra makes it available; you choose whether to apply it on each case.
Step 5
Try your setup on a case
Add the work to a case and select your product. Use Add product extra to add an option when the case needs it.
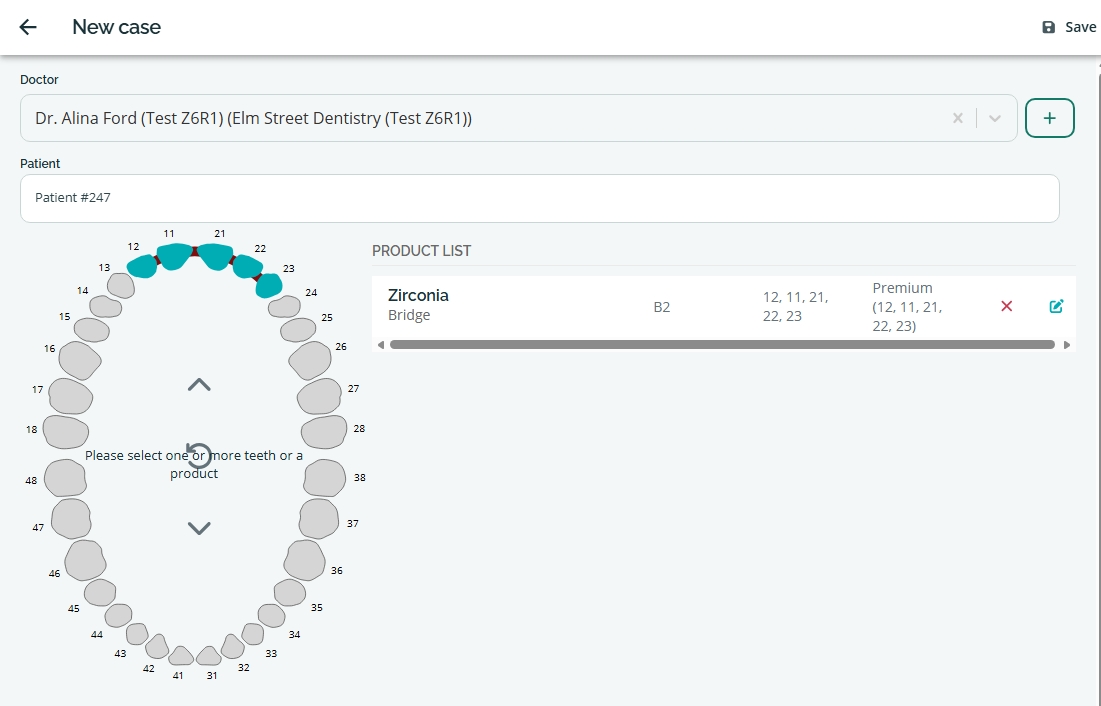
Here, Zirconia is selected for a bridge on teeth 12, 11, 21, 22 and 23, with the Premium extra applied to those teeth and shade B2 entered in Color. For tooth-based work, check which teeth the extra applies to before saving.
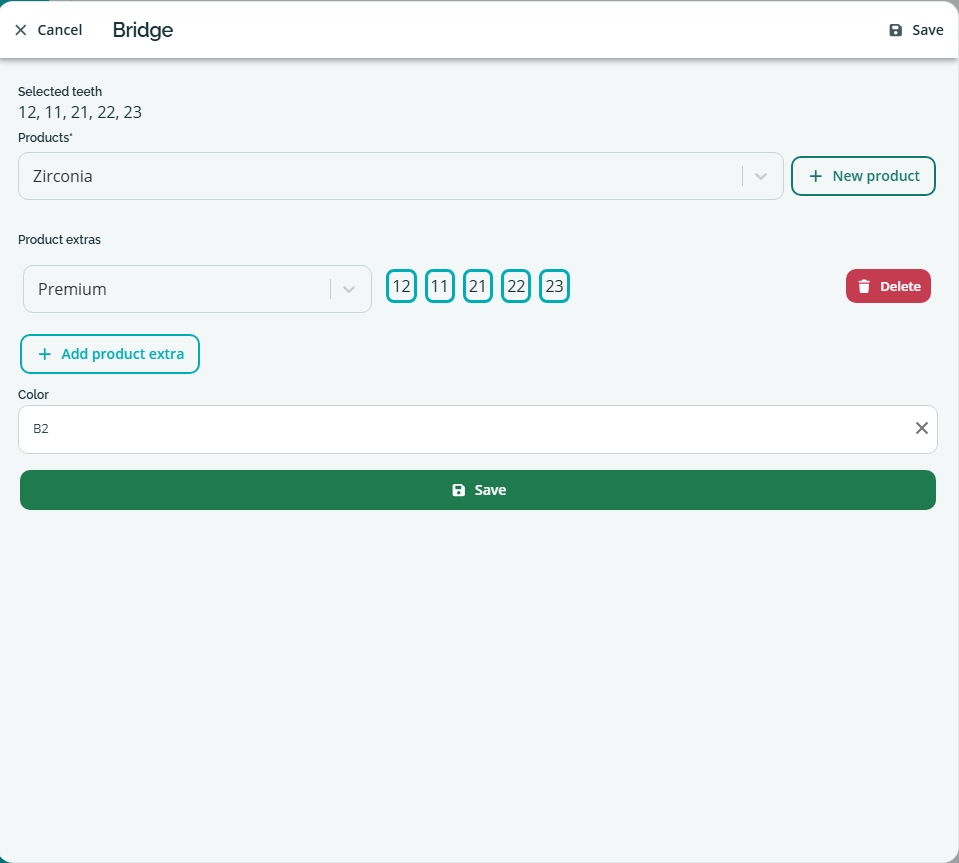
Save the product selection, then review the case’s Product list. The product, work type, shade, teeth and extra should match the work you intend to make. Save the case when you are ready.